
How to Scan Film Negatives: Free In-Browser Scanner
Digitize 35mm and medium-format film negatives into true-color positives instantly. Powered by client-side WebGL 2.0 shaders with automatic C-41 orange mask subtraction, live camera scanning, and daylight-calibrated light tables.
35mm Film Strip Reel & Contact Sheet
No converted frames appended yet. Convert a negative in the studio above and tap "Append to Reel" to assemble a 6-frame strip.
35mm Film Cross-Section & C-41 Tri-Pack Chemistry
The cellulose triacetate base contains the characteristic C-41 orange mask composed of unreacted azo-dye couplers. Our WebGL shader normalizes this transmission base (T = I / B) to prevent the severe cyan color cast of naive inverters.
52 Calibrated Analog Film Stocks
The Complete Guide to Scanning Film Negatives at Home
Everything you need to digitize color and black-and-white negatives without purchasing expensive dedicated hardware.
Film scanning at archival quality requires precise control over optical transmittance, color balance, and sensor resolution. Traditional dedicated film scanners use linear CCD arrays with motorized film carriers, while modern high-speed digitization leverages digital camera sensors and calibrated light sources to capture all photographic information in a fraction of a second.
Whether digitizing 35mm rolls, 120 medium format, or archival sheet film, the fundamental physics remains consistent: unexposed orange dye mask rebate neutralization, logarithmic optical density transformation, and tone curve mapping. Explore the practical step-by-step methodology below.
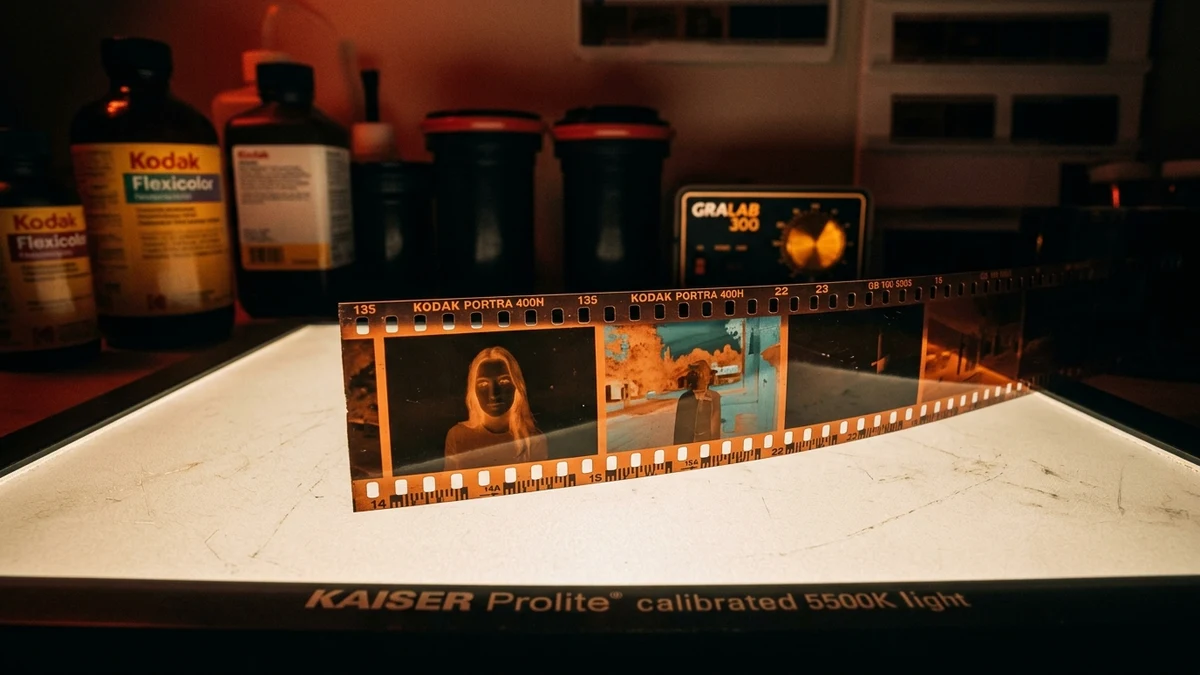
What Are the Three Primary Methods to Scan Negatives at Home?
The three primary methods for digitizing negatives at home are smartphone macro scanning, digital camera scanning using a mirrorless or DSLR camera with a macro lens, and flatbed scanning with a transparency backlight unit.
Smartphone Scanning
Cost: Free (under $15 for materials)
Speed: 5 seconds per frame
Best For: Family shoebox archives, quick digital sharing, and previewing vintage rolls before professional printing.
Camera Scanning (DSLR / Mirrorless)
Cost: $150–600 (if camera owned)
Speed: 2 seconds per frame
Best For: High-resolution 24–45 Megapixel raw captures with authentic silver halide grain retention.
Flatbed Film Scanners
Cost: $300–800 (dedicated hardware)
Speed: 2–4 minutes per frame
Best For: Unattended batch scanning of medium format 120 and large format 4x5 sheet films.
Why Does Simple Color Inversion Fail on Color Film Negatives?
Color negative films incorporate an integral orange mask made of unreacted azo dyes that absorb unwanted blue and green light during darkroom optical printing. A simple mathematical negation inverts this orange base into an intense cyan cast that ruins contrast and skin tones.
When color negative film is manufactured, dyes do not absorb light with perfect spectral selectivity. Cyan dyes have unwanted secondary absorption in the green and blue spectrums. To correct for this defect in traditional darkroom photo paper exposure, Eastman Kodak introduced colored couplers that leave a persistent amber/orange mask across unexposed areas of the film rebate.
Linear Transmission: T_c = clamp(I_c / B_c, 0.0001, 1.0)Optical Density: D_c = -log10(T_c)Positive Luminance: L_c = 1.0 - T_c What Is the Proper Step-by-Step Negative Preparation Protocol?
Before digitizing any negative, clean the film surface with an anti-static rocket blower, wear lint-free cotton archival gloves, and ensure the film emulsion is positioned completely flat against your carrier.
- Never Touch Emulsion with Bare Skin: Skin oils attract fungal spores and permanently stain silver halide coatings. Always wear clean cotton gloves.
- Identify the Emulsion Side: The emulsion side has a matte, non-reflective appearance, while the base side is glossy. Orient the emulsion facing toward your camera lens to prevent mirrored lettering on edge rebate numbers.
- Use Anti-Static Rocket Air: Never use canned compressed air containing propellant chemicals. Use a rubber hand blower to dislodge surface dust particles.
- Avoid Direct Screen Contact: Placing film directly onto laptop or phone screens produces moiré interference patterns. Maintain a 15mm glass spacer distance.
Which Export Format Is Best for Film Negatives: TIFF, PNG, or JPEG?
For archival preservation and fine-art digital enlargements, export in uncompressed 16-bit TIFF or PNG to retain full shadow latitude; for everyday sharing, high-quality WebP or JPEG offers excellent compression without perceptible grain degradation.
| Format | Bit Depth | Compression | Recommended Application |
|---|---|---|---|
| PNG (Standard) | 8-bit / 16-bit | Lossless | Web viewing, archival digital albums, zero compression artifacts |
| TIFF (Archival) | 16-bit Linear | Uncompressed | Museum preservation, gallery darkroom printing, extensive color grading |
| JPEG (High) | 8-bit | Lossy (90–95%) | Social sharing, cloud photo libraries, mobile viewing |
Frequently Asked Questions About Scanning Negatives
01 Do I need to buy a dedicated film scanner to digitize my negatives?
No. You can achieve professional archival results using a modern smartphone camera or digital camera paired with our in-browser calibrated 5500K backlight and WebGL color inversion engine. Our tool replaces flatbed scanners like the Epson V600 for casual and high-resolution scanning.
02 Are my family photos uploaded to any external server?
Never. All image processing, color math, and camera feeds execute 100% locally in your browser memory via WebGL 2.0 fragment shaders. Zero image bytes leave your machine, guaranteeing total privacy for sensitive archives.
03 Why do color negatives look orange, and how does this tool fix it?
Color negative film uses an integral orange dye mask to compensate for imperfect absorption in cyan and magenta dyes. Our 1-click eyedropper tool samples this orange base rebate and mathematically neutralizes it in linear transmission optical density space, avoiding harsh cyan color shifts.
04 How do I scan negatives without introducing screen pixel lines (moiré)?
When using an iPad or laptop as a light table, elevate the negative at least 15mm above the screen using clear acrylic spacers or drinking glasses. This defocuses individual LCD subpixels so only diffuse pure white light illuminates your film.